Monday, January 31, 2011

Weekend Makeover & The Perfect Gray

Looking for a great gray?

We did a little fixin' up of our guest bathroom last weekend.  When we first moved in I painted it this dark brown color and I was really getting tired of it.  It looked nice with white accents, but now that we have kids, our towels and washcloths are not all white!  With no natural light, it was also really dark.   Here are some before pictures:


Love that cross, but it is clearly too small for this big wall!  And our towel rod is clearly too small for properly drying more than one towel...

Love that star, but its not working for me there.  I don't have a picture of the old light fixture but it was one of those Hollywood Ms. Piggy fixtures... you know what I mean- with the light bulbs sticking straight out?

We decided to paint the bathroom the same color thats in the rest of our house- its called Silver Dollar and its by Olympic Paints.  I love that brand because its low-odor and low-VOC which means no nasty/unhealthy paint fumes!  When we repainted our living room and dining room this shade over a year ago, we agonized over the decision and probably bought about 10 little sample cans and tried them out all over the rooms.  It was a pain at the time, but I'm SO glad we took our time to sample the colors- they all look so different in different rooms and with different lighting!  This color is a gray tone with golden or brown undertones.  Its not a stark gray.  Its definitely still a cool color, but the golden undertones warm it up a bit... 


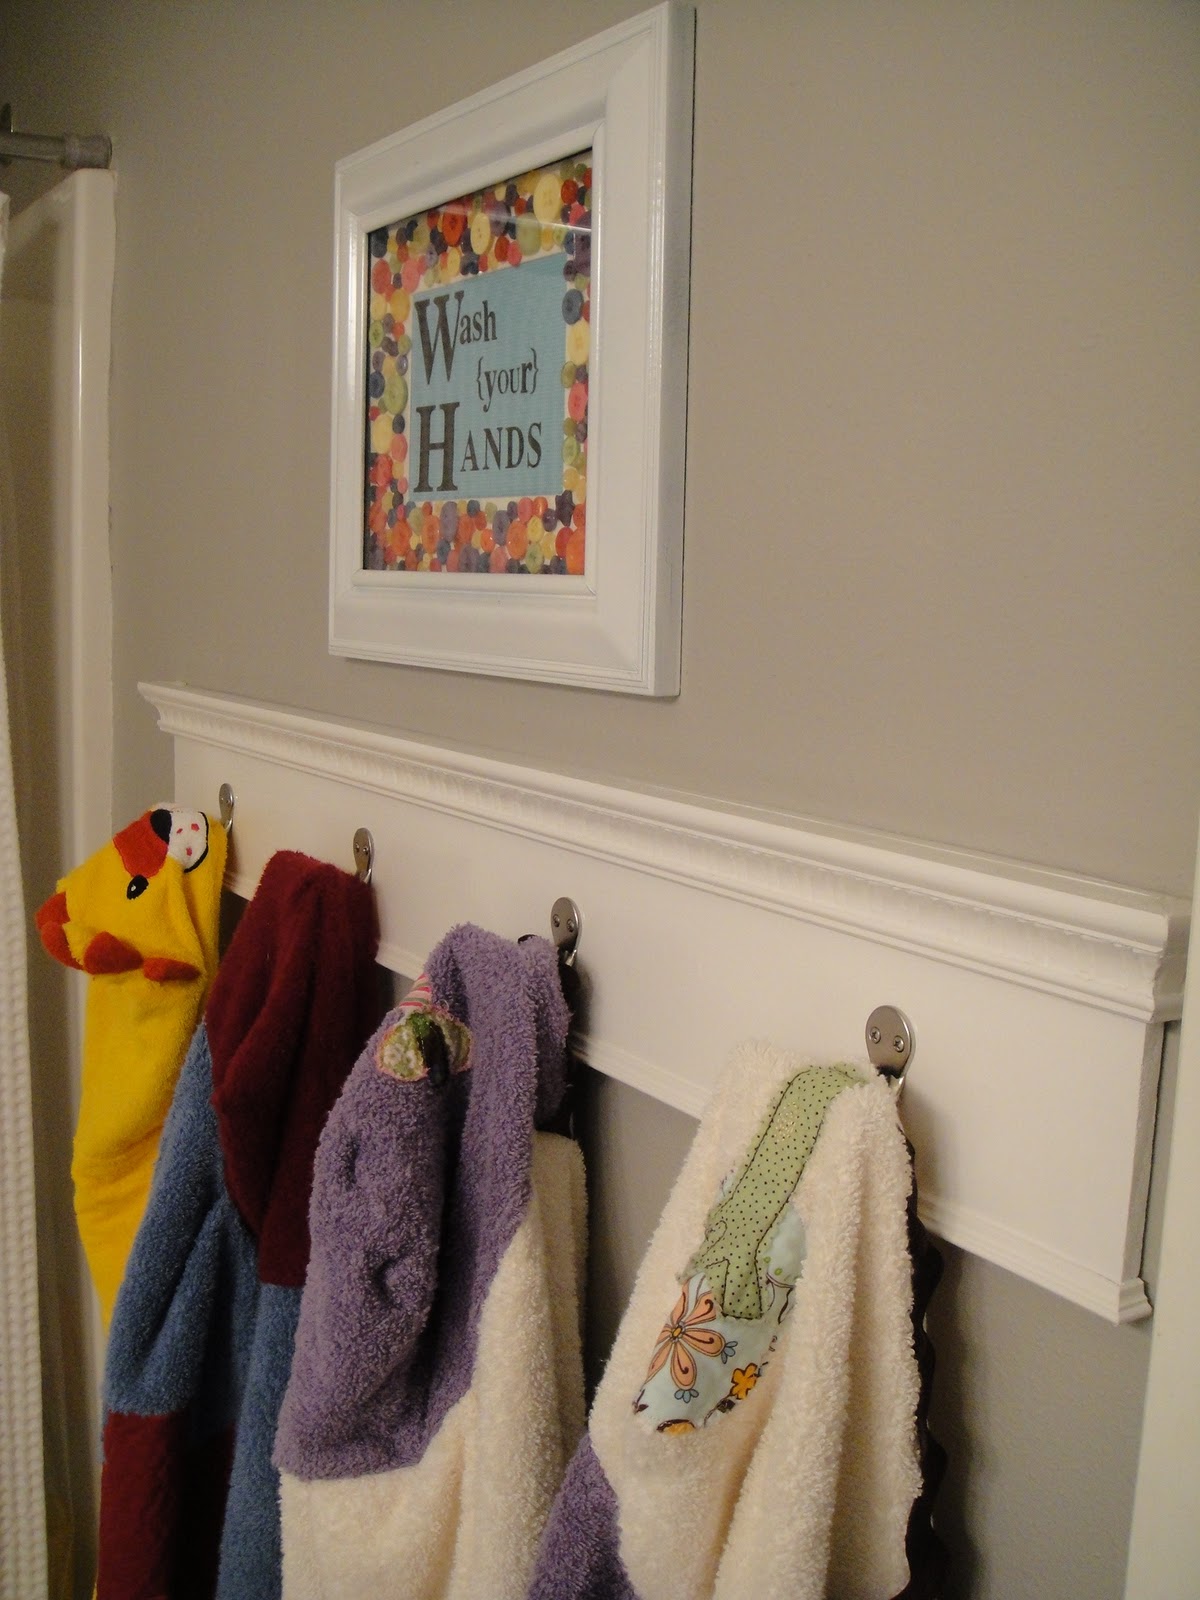
 For some cheap and fun art, I made these little prints with some old frames I had and the Bag o' Buttons from Hobby Lobby!  I decoupaged the buttons to the frames and then used rub-on letters on scrapbook paper for the print itself.  I guess I could have actually printed them from my computer, but I like the way these turned out...


We replaced the towel ring, toilet paper holder, and light fixture with new brushed nickel fixtures.

The little cabinet over the toilet has brought in some much needed storage for us and was only $55 at Wal-Mart!  I love the beadboard look, it adds a little cottage charm.


Since the old towel rod wasn't cutting it, I had a vision for this row of hooks and Paul made my dream a reality!  We bought a thin board and attached a chunky moulding to the top and a smaller one to the bottom.  Then he primed and painted it (high gloss so it would stand up in the bathroom), screwed on the hooks, and screwed the whole thing directly into the wall...

I wish I had pictures of the process for you- it really was a pretty simple project.  I love how custom it is and the charm it brings to this little bathroom.

  If you are on the fence about painting something or choosing a color- may this be the little bit of inspiration you need to just go for it!  Painting the entire bathroom took only about 45 minutes and I was able to get it all done in two days while my kids napped (primed one day, painted the next).

Looking for the perfect gray?  Here are the links to the other rooms in my house painted with Olympic's Silver Dollar:


Happy Painting! 

post signature

Viewer Appreciation Giveaway Winner

And the winner of the digital probe thermometer is..........Bush Family!  We'll get your prize out to you soon (probably tomorrow).  We hope you enjoy it!  And here is the proof footage from our 3rd party, independent sweepstakes organization, which makes sure that all giveaways are run with the most recent technology and according to the strictest of ethical guidelines.


Congratulations to Bush Family and thank you all for watching, hopefully learning, and being a part of this with us.  Looking forward to more episodes and more collaboration with you all in what you want to see.  Thanks again!

post signature

Saturday, January 29, 2011

Seven Months

On Monday, Norah turned 7 months.  And the day before that, we had her dedicated at church.  It was such a special moment, to present her to our church and commit her to the Lord.  It is our hope and prayer that it was a first step in a long line of spiritual milestones in her life, leading her to faith in Jesus.

Here are a few pictures from our lunch after church...


 ...and then a few more from our backyard... the weather has been so beautiful lately!


The Lord your God is with you, the Mighty Warrior who saves  He will take great delight in you; in his love he will no longer rebuke you, but will rejoice over you with singing. "  Zephaniah 3:17
post signature

Thursday, January 27, 2011

CWP Episode 6 - Viewer Appreciation


Roasted Turkey Breast
  • 1 half turkey breast, rib bones in or out (doesn't really matter)
  • 1/4 cup kosher salt (I said 1/2 cup in video...sorry)
  • 1/4 cup brown sugar (I said 1/2 cup in the video...sorry again)
  • 4 cups water (In the video I said 2 or 2 1/2 cups, but it's 4...don't know what I was thinking)
  • 2 Tbs softened butter
  • 1 tsp fresh rosemary or thyme, chopped fine
  • zest from one large lemon
  • Vegetables, such as celery, carrot & onion.  Herbs and citrus would be good too.
  • salt and pepper
- Dissolve the salt and sugar in the water and pour into a gallon-sized plastic bag (if you are going to add herbs or spices, I recommend bringing everything just barely to a boil and letting it cool before putting in the plastic bag).
- Place the turkey breast in the brine and get as much air out of the bag as possible, ensuring complete coverage of the brine around the turkey.
- Keep in the refrigerator for as little as an hour, but no more than 12 hours.
- Preheat your oven to 375 F
- Combine the butter, rosemary and lemon zest in a small bowl and set aside.
- On a half sheet tray, arrange any vegetables that you can find as a bed for the turkey to rest on (this is a good way to get rid of vegetables that are almost ready to be thrown away).
- Remove the turkey from the brine.  Rinse in cold water and thoroughly dry.  - Gently release the skin from the muscle by sweeping your fingers under the skin, being careful not to break through the skin.
- Spread the butter mixture all over the breast underneath the skin, making sure to cover as evenly as possible.  Place the turkey breast on the vegetable bed.
- Coat the skin with olive oil and liberally season with salt and pepper.
- Insert a probe thermometer into the deepest portion of the breast.
- Place in the middle of the preheated oven until the temperature reaches 154 F, around 1 hour 15 minutes.
- Do not remove the thermometer until the turkey has rested for about 10 minutes.  Carry-over cooking will take the temperature to right around 162 F, which is exactly what you want.  Enjoy!

Sweet Potato Hashbrowns
  • Sweet Potatoes
  • Olive Oil
  • Kosher Salt
  • Basil
- In the largest frying pan you have, heat enough oil over medium heat to almost cover the bottom.
- Cut the potatoes into a 1/2" dice, or smaller if you prefer.  If you do go smaller, you can probably boost the heat a bit too.
- Once the oil is hot, place the potatoes in the pan and spread out as much as possible so that they're not stacked on top of each other.  You may need to do this in 2 pans or 2 batches depending on how many potatoes you are using.
- Let the potatoes sit for about 5 minutes and flip.  Repeat this probably 2 more times until they are slightly crisp on the outside and soft of the inside.
- Sprinkle with kosher salt and add the basil. 
- **Alternate Method - If you've just got too many potatoes, cut them into 1" chunks, coat with oil and salt, put them on a sheet tray and roast in the oven at 400 F for about 30 minutes or until they are tender.  Throw on the basil when they come out of the oven and toss.  Enjoy!**

Homemade Shells and Cheese

  • 2 Tbs butter
  • 2 Tbs onion, grated or minced as fine as possible
  • 1 small clove garlic, minced as fine as possible
  • 2 Tbs flour
  • 1 cup milk
  • 4 oz sharp cheddar cheese, the sharper the better
  • 2 oz gruyere cheese
  • 4 - 6 oz dried pasta, shells or macaroni
  • 3 - 4 fresh basil leaves, chopped fine
  • salt and pepper
- In a medium pot, boil enough water for pasta and cook pasta until al dente or just slightly firm...no mushy pasta please. **Do not rinse the pasta after cooking**
- While pasta water is heating, add the butter, onion and garlic to a saute pan over medium-low heat.  Add just a pinch of salt to draw out a bit of moisture.
- Let the butter melt down and cook the onions and garlic for 5 - 7 minutes, until they get really soft.
- Keep an eye on the pasta! :)
- Sprinkle the flour into the pan and stir around to fully combine with the butter.  Cook for about a minute.
- Slowly add the milk to the pan while constantly stirring.  This will help to prevent lumps.
- Let the milk cook for a few minutes and thicken until you can draw lines in the milk (see video).
- Turn heat to low and add the cheeses a handful at a time, completely combining with the milk before each addition.
- Turn the heat off and stir in the basil.  Add salt and pepper to taste.
- Return cooked pasta to original pot and pour as much cheese sauce over the pasta as desired.  Stir to combine.  Enjoy!


post signature

Monday, January 24, 2011

Chalkboard Reveal!

No, not an entire wall, but I did paint the pantry door!  When I first started painting what looked like black paint on my crisp white door, I got a little freaked out...


But once it was "conditioned"  (covered it with chalk and then erased)...


...it received the enthusiastic approval of the whole family!


Since I had the chalk out, I changed up our mantle chalkboard too...
Paul and I are both working on scripture memory and decided to see if Charlie could do it too.  I mean, he knows all the words to "Mickey Mouse Clubhouse" and "Jesus Loves Me" so why not John 3:16?  He has really surprised us with how well he has learned it.  I love that I found something fun for our house that has also led to spiritual significance for our family, because isn't that what the home is for?  

Hope you are having a great Monday!  Thanks so much for watching and commenting on our last video!!  It means so much to us that you have enjoyed it and take the time to watch.  Its been fun for both of us!  We have a few surprises coming up this week for our viewers/readers so stay tuned...

post signature

Tuesday, January 18, 2011

CWP Episode 5 - The Challenge


Really no recipe here, but here is a blueprint for how I like to do these quick meals:
  • A Foundation (usually whole grain pasta or eggs)
  • 1 protein
  • 2 vegetables
  • Extra flavor
So you can really substitute anything you can think of in there and get a lot of different dishes from this one blueprint.  Here are some items that I try to have at all times that really help when time is short.
  • Whole grain pasta - in a variety of shapes and sizes
  • Eggs
  • Extra Virgin Olive Oil
  • Balsamic Vinegar
  • Potatoes - I recommend fingerlings for their superior flavor.  Small red potatoes are good, too.
  • Red Onions
  • Garlic
  • Celery
  • Carrots
  • Mushrooms - normally just white button mushrooms, but also other varieties
  • Asparagus
  • Frozen greens, such as spinach, brocolli or peas
  • Fresh ginger root
  • Soy Sauce
  • Rice Vinegar
  • Hoisin Sauce - These 4 Asian-inspired ingredients can help the monotony that may come from making this a lot.  Use them with pasta to make an asian noodle dish or stir fry.
  • Canned white beans
  • Canned chick peas or garbonzo beans
  • Frozen chicken breast strips - I like the strips because they thaw quicker and I usually cut them into small pieces anyway, so who needs a whole breast?
  • A good quality smoked sausage
  • Parmigiano Reggiano - from Italy, not Kraft.  No exceptions...at least not here :)
  • Lemons
  • Fresh herbs - basil and thyme are my two biggies
  • Kosher salt
  • Whole black pepper in a pepper mill
I'm sure there are probably some items I forgot, but that will do for now.  I really hope this helps you to make meals that taste good and won't leave you feeling awful afterward.  Enjoy!

post signature

Monday, January 17, 2011

Chalk it up...

I've been eyeing some of these pictures for a while now...

(source: here

...thinking of ways to add a little more fun...


 (source: here)

...can you guess what project I'm dreaming of?

(source: unknown)

(source: here)
post signature

Thursday, January 13, 2011

Potty Is NOT Fun

The title of this post is a direct quote from Charlie.  And I have to say that I agree with him.  Potty training him has been an uphill battle from the start.  But I'm starting to see a light at the end of the tunnel (aka yellow in the potty and not on the floor!) so now I can enjoy one of the best things about potty training... seeing this little guy in his tighty-whiteys...


... and apparently when wearing tighty-whiteys, a display of muscular strength is always in order...


...followed by a major, double, jumping, high-five.


Maybe potty training's not so bad after all! :)


post signature